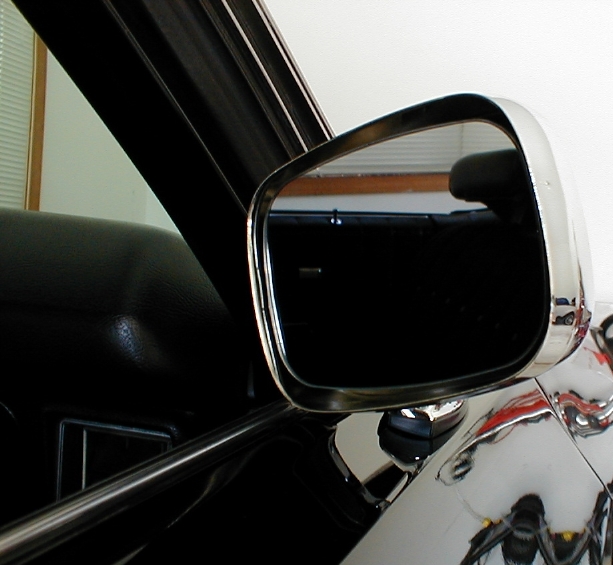
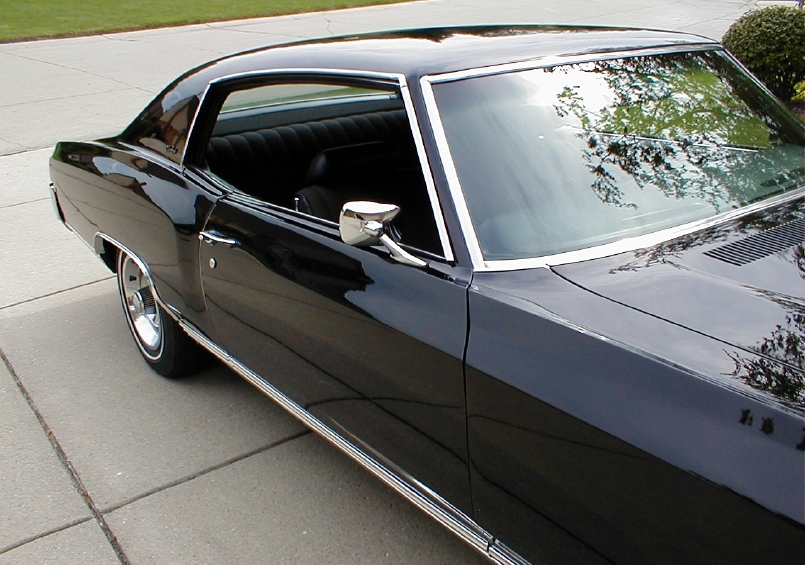
I added a right (non remote) chrome mirror that matches the left remote chrome mirror to my 1971 Monte Carlo in August 2006. This mirror uses a flat style glass not convex like in today’s cars so it is less effective and obviously doesn’t have the words “OBJECTS IN MIRROR ARE CLOSER THAN THEY APPEAR”. I can’t believe it’s been that long!
The mirror was purchased from Ausley’s Website
Here is a step-by-step guide of how I performed this task with pictures, comments and helpful additional dialog that hopefully will educate and amuse you.
- Roll down the window
- Remove the door lock knob
- Remove the arm rest base (three Philips screws)
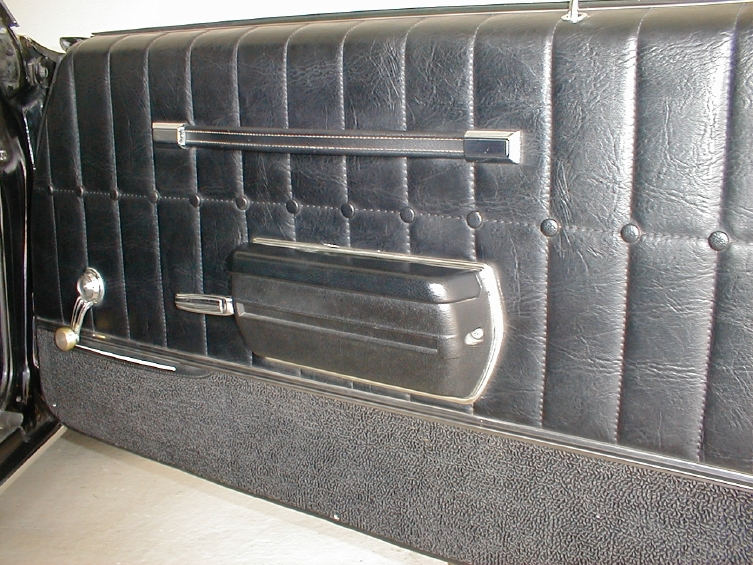
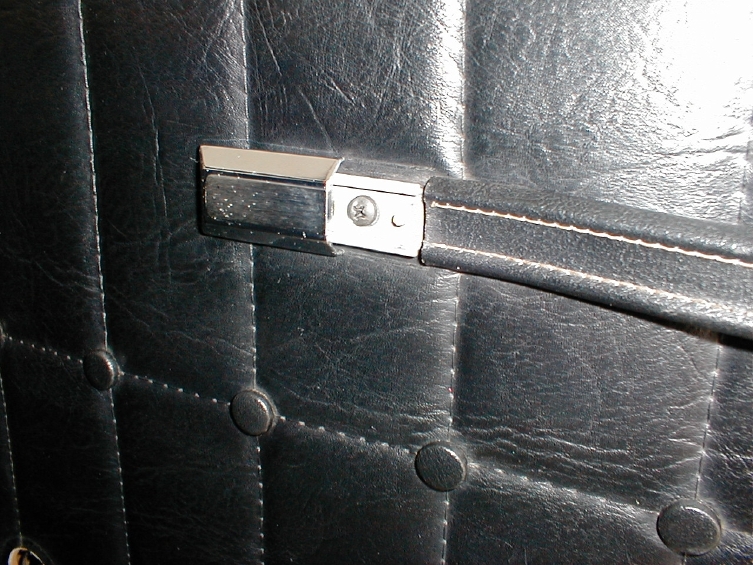
Remove the two door pull strap covers.
They slide off, the front one forward, the rear one back. Small built-in clips hold the covers in place but at this point yours, like mine, are probably broken and the covers will slide off fairly easily. If not you will have to slide a thin piece of metal (like a feeler gauge) under the cover to release the clip. This is not an easy thing to do, in fact I believe I was unable to successfully remove mine years ago, and the clips broke in the process.
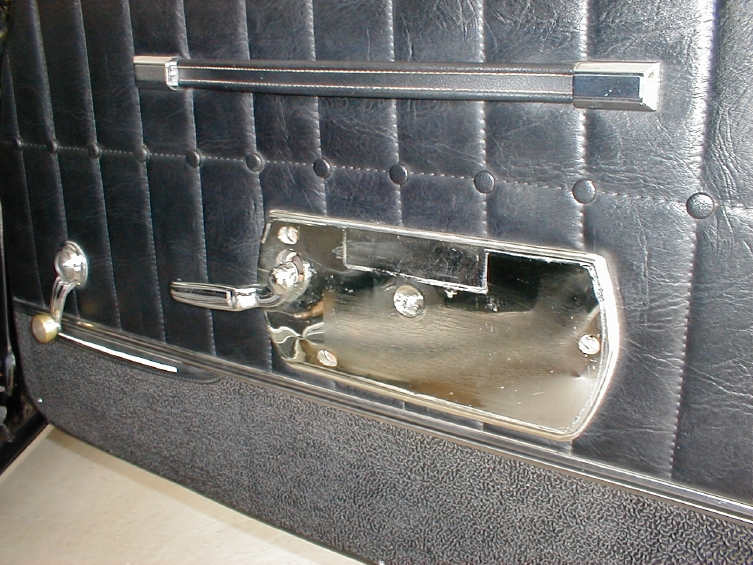
- Remove the one Philips screw from under each door pull strap cover. (Note, these are special screws don’t lose them)
Remove the arm rest base (three Philips screws)
Note on the underside of the base are the two screws that hold the armrest pad in place. Tighten them now if they are loose.
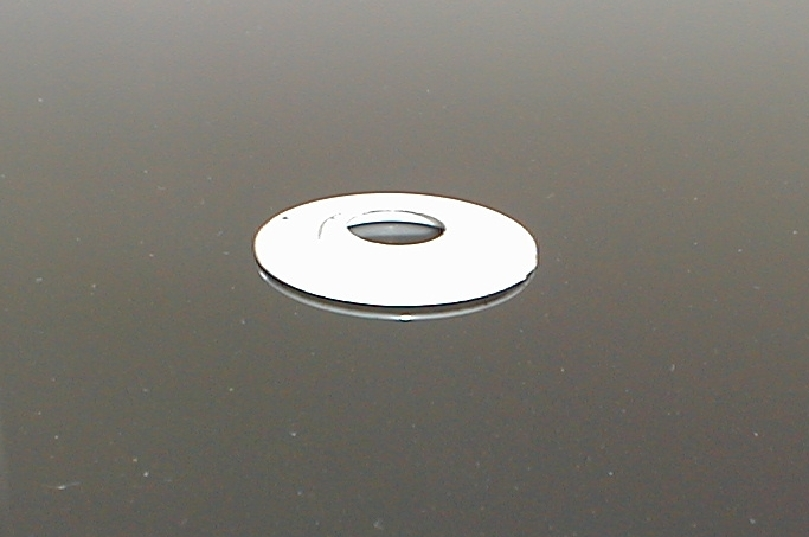
- Remove the door release lever and the window crank (special tool required for the window crank is not needed for the door release lever but will work)
Special tool under window crank. Note the small C clips should be put back on both the window crank and door release lever NOW so you don’t lose them.
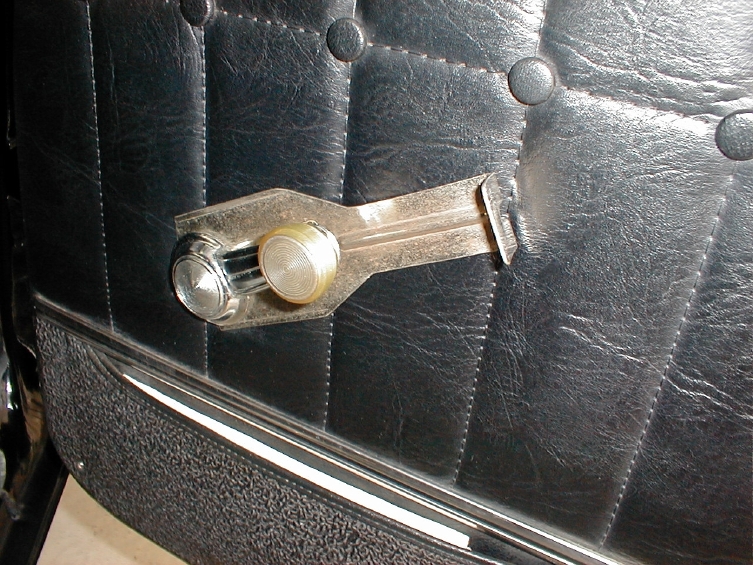
Note the window crank has a round white plastic washer called escutcheon that prevents the crank handle from tearing the vinyl when rotated.
The innie goes toward the window crank giving the clip room. It won’t fit the other way. I feel this part is very important so if you don’t have one, get one.
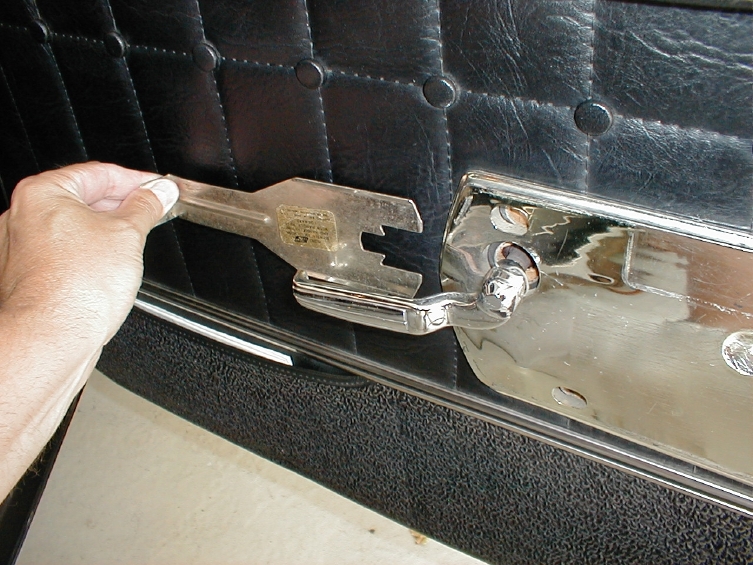
Door release. Tool is not required but will work. .
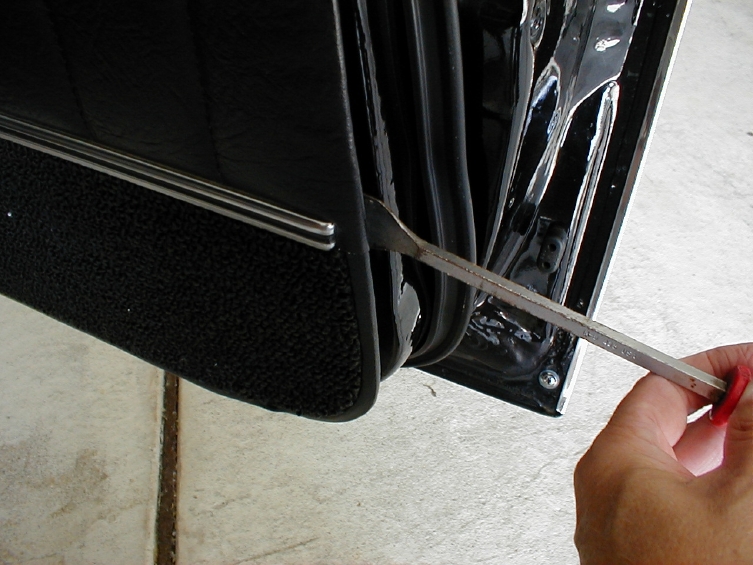
I used a gasket scraper. Remove the 5 Philips screws along the bottom of the door trim panel in the carpeted area. Note, Some of these screws could be driven deep into the trim board and buried by the carpet pile so look carefully.
Using a flat prying device like a gasket scraper, locate and carefully pry the three clips attached to the door trim panel away from the door frame at the rear and the three clips at the front of the door.
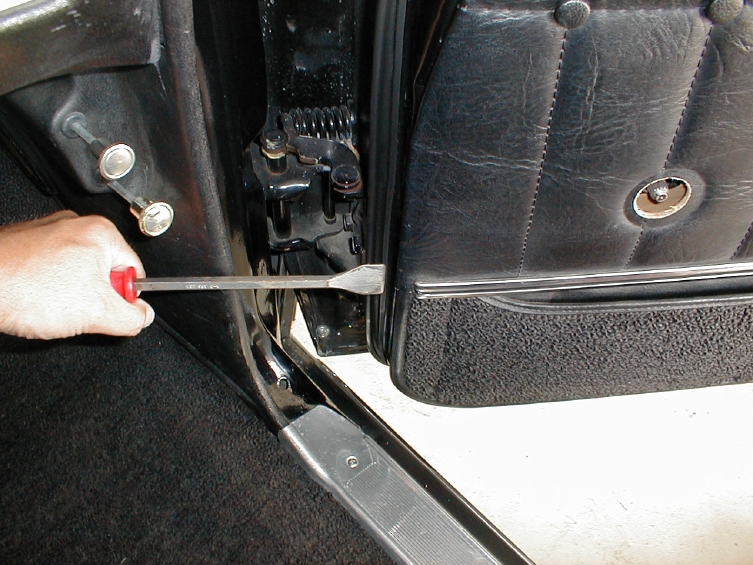
Pull the lower portion of the door trim panel away from the door and at the same time lift up to remove the trim panel.
Remove the window crank spring (note how it’s installed with the large end touching the back of the door panel) don’t loose this and remember to put it back.
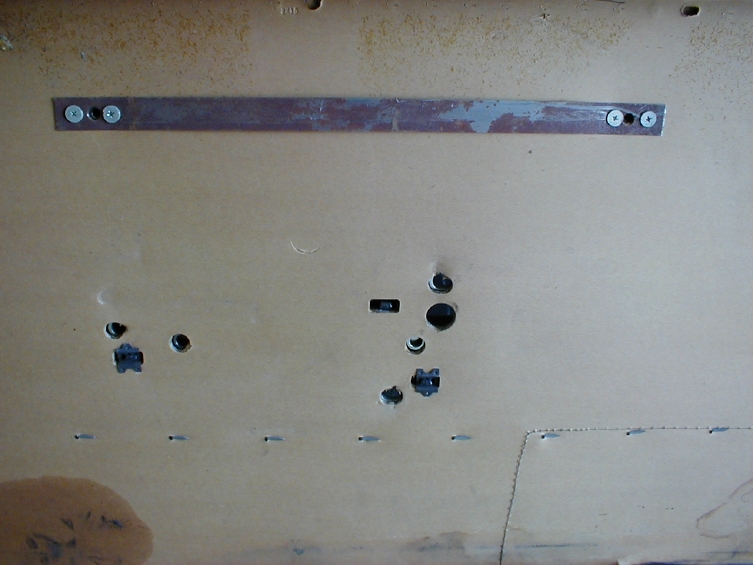
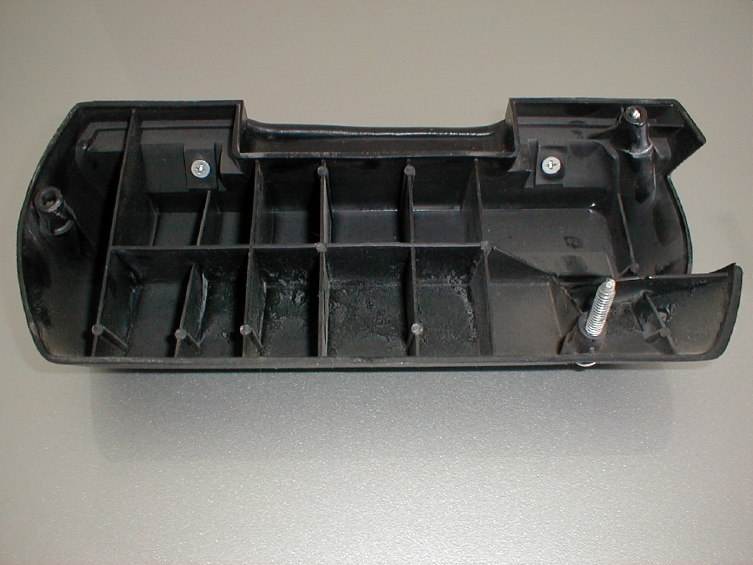
Backside of the right door panel. At this point, check the four pull strap screws for tightness and make sure the six clips are in place (not shown in photo) so they don’t get lost.
Note the pull strap screw tips can interfere (too long) with the covers on re-assembly. I ground mine off a bit so the covers would slide back on.
NOW FOR THE CRITICAL PART
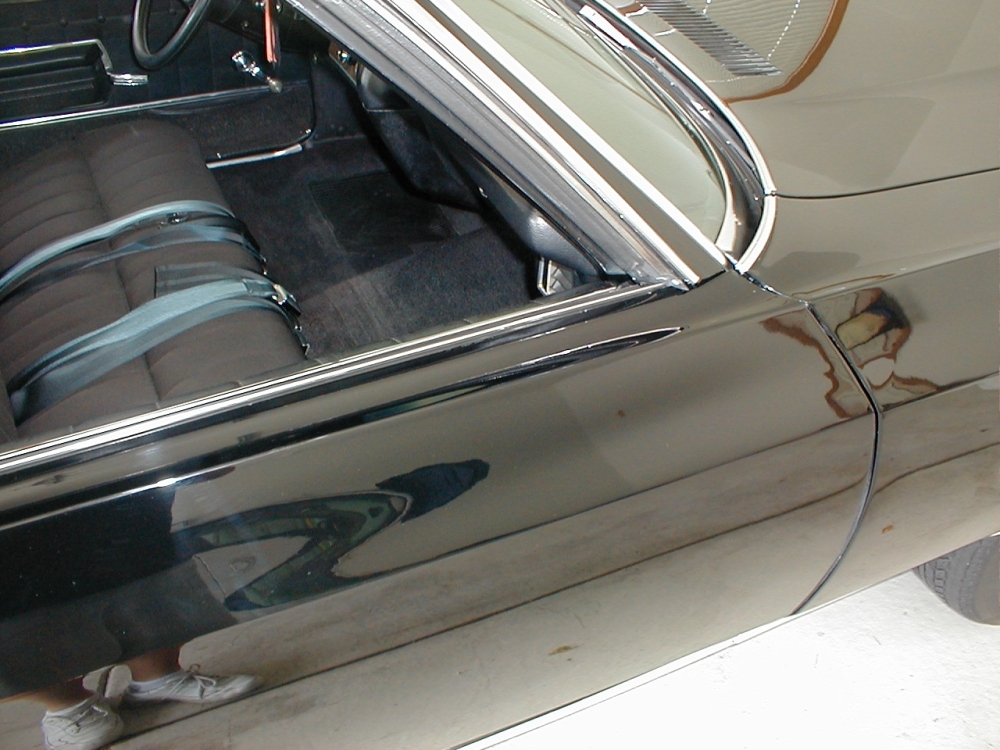
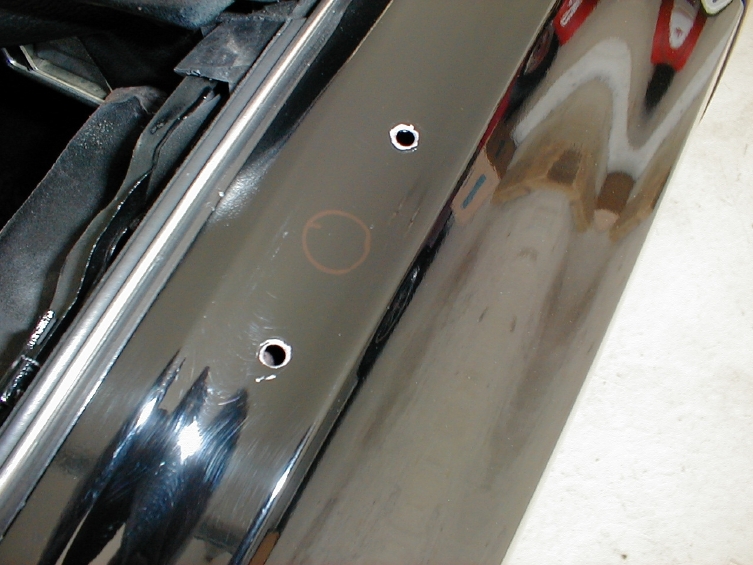
Measure to drill the two 1/4” holes. The front hole is 6-7/8” back from the front of the door. The rear hole is 3-1/4” back from that and both are 7/8” inboard from the feature line (all measurements are on center). Mark the two spots and check it again. I recommend you measure this yourself, using my data as a guide.

Note my mirror came with two gaskets as seen here.The one on the left with one large opening is the correct one. The other gasket is for a driver’s side remote mirror. I got both in my box with the wrong one already on the mirror. I know of one person in the club who got only the wrong one.
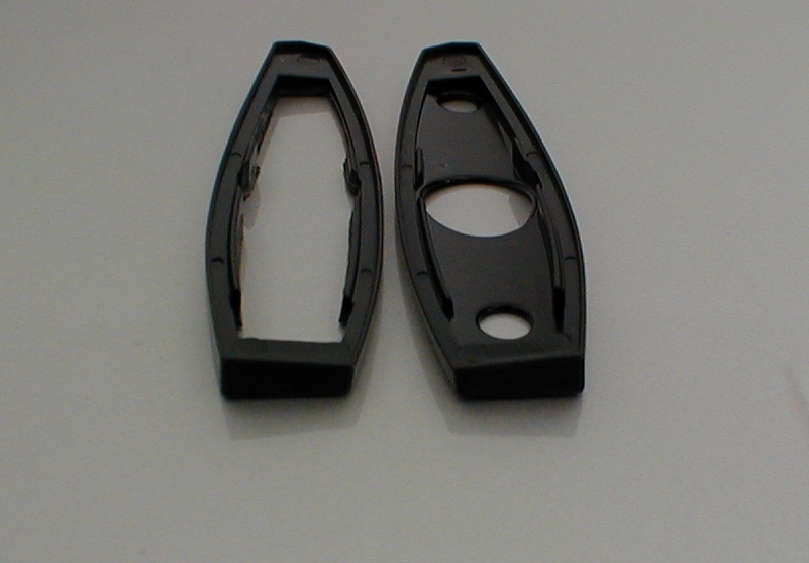
This is a MAJOR problem and your mirror will look like this with the wrong (Left) gasket in place. The window will not roll up!
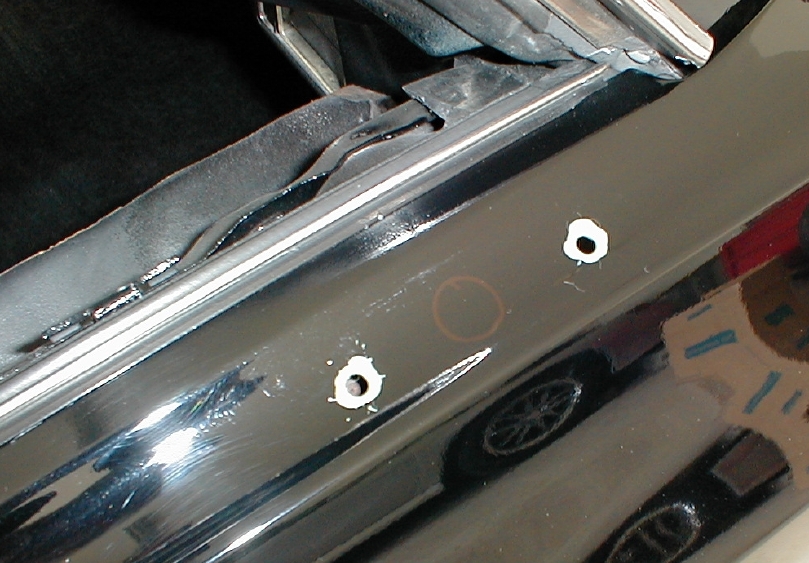
Note the picture shows a large reddish circle between the two holes I drilled. This is not needed and only there because I was using the wrong gasket and drew it with a Sharpie.
After a trial fit, I used a Q-Tip dipped in zinc rich primer to touch up the bare metal areas around the holes.
ATTACHING THE MIRROR
Carefully pull down or remove the paper water shield.
My mirror came with two 10mm nuts. I added a lock washer to each nut and tightened both securely.
In reality, the rear mirror stud comes directly in contact with a brace welded into the door assembly preventing this nut from being anything but easy to install or tighten. I left the front nut very loose and lifted the rear of the mirror so the stud was only protruding into the hole about 1/4”. Small fingers and great manual dexterity is needed to do this step but even I managed after many attempts. Note a magnet to retrieve the nut when it falls into the door is required. Removing the metal shavings inside the door at the bottom (they’re sharp) from the drilling process is also a good idea. It is helpful to have a variety of both deep and shallow 1/4” drive sockets and extensions. I didn’t keep track of what lengths worked well and what didn’t but what ever you use, the rear nut is a tough one to tighten. I wondered about removing some of the brace to give me more room, but didn’t.
REASSEMBLY
1- Secure the old paper water shield or replace it. Don’t extend the shield beyond the area the door panel will cover or you will have to remove the door panel again to cut some off.
2- Remember the window crank spring I mentioned above? It’s time to put it back on, small end facing the door side and large end against the door panel side. This spring tends to fall off so keep an eye on it.
3- Attach the top of the door panel making sure the door lock stud is positioned through the hole on top and swing the lower portion in place.
4- Line up the six clips and hit them in place one by one with your hand.
5- Install the two Philips screws into the pull strap (Leave loose for now) and start the five small Philips screws in the lower part of the door. Once you have them all started tighten them all up.
6- Install the door latch handle and window crank (remember the escutcheon) Note position the window crank so it’s in the same position (with both windows down) as the left door. I have positioned mine so the crank knob doesn’t hit my leg when the window is all the way down.
7- Install the armrest base and tighten the three Philips screws.
8- Install the door lock knob and verify it functions properly.
9- Adjust your new right chrome mirror for many years of driving fun and enjoyment and safer lane changes.
Note the information contained in the above article is a written document of how I installed my right side mirror on my 1971 Chevrolet Monte Carlo with manual windows.
All reference made to the right side of the above mentioned automobile is understood to be the same as the passenger side of said vehicle.
Results may vary and no guarantee as to the accuracy or sanity of the author Bruce Stange.

Looks Awesome. Many Thanks for taking the time to do this article.
LikeLiked by 1 person
Thanks Bob.
LikeLiked by 1 person
Did mine yesterday. Finally got the nerve to do this improvement only because of your article & though fullness to take the time & work to write this article & instructions, Which are 100% correct. Many Thanks again
LikeLiked by 1 person
Where can I buy a right side mirror
LikeLike
The mirror was purchased from Ausley’s Website
https://chevelle.com/1970-72-chevelle-malibu-or-el-camino-right-hand-matching-remote-mirror/
LikeLike
WoW! Thanks for all this info! The problem I had when buying a new Driver’s mirror was in fact the gaskets they sent along with the mirrror. NONE of them worked! The angles were wrong for the car. Needless to say, I just ended up selling the mirror to my buddy with a Chevelle.
I will now have to revisit this and hope to get the right gasket this time!
LikeLike